 Here is all the documentation for assignment 6!
Here is all the documentation for assignment 6!
Here is all the documentation for assignment 6!
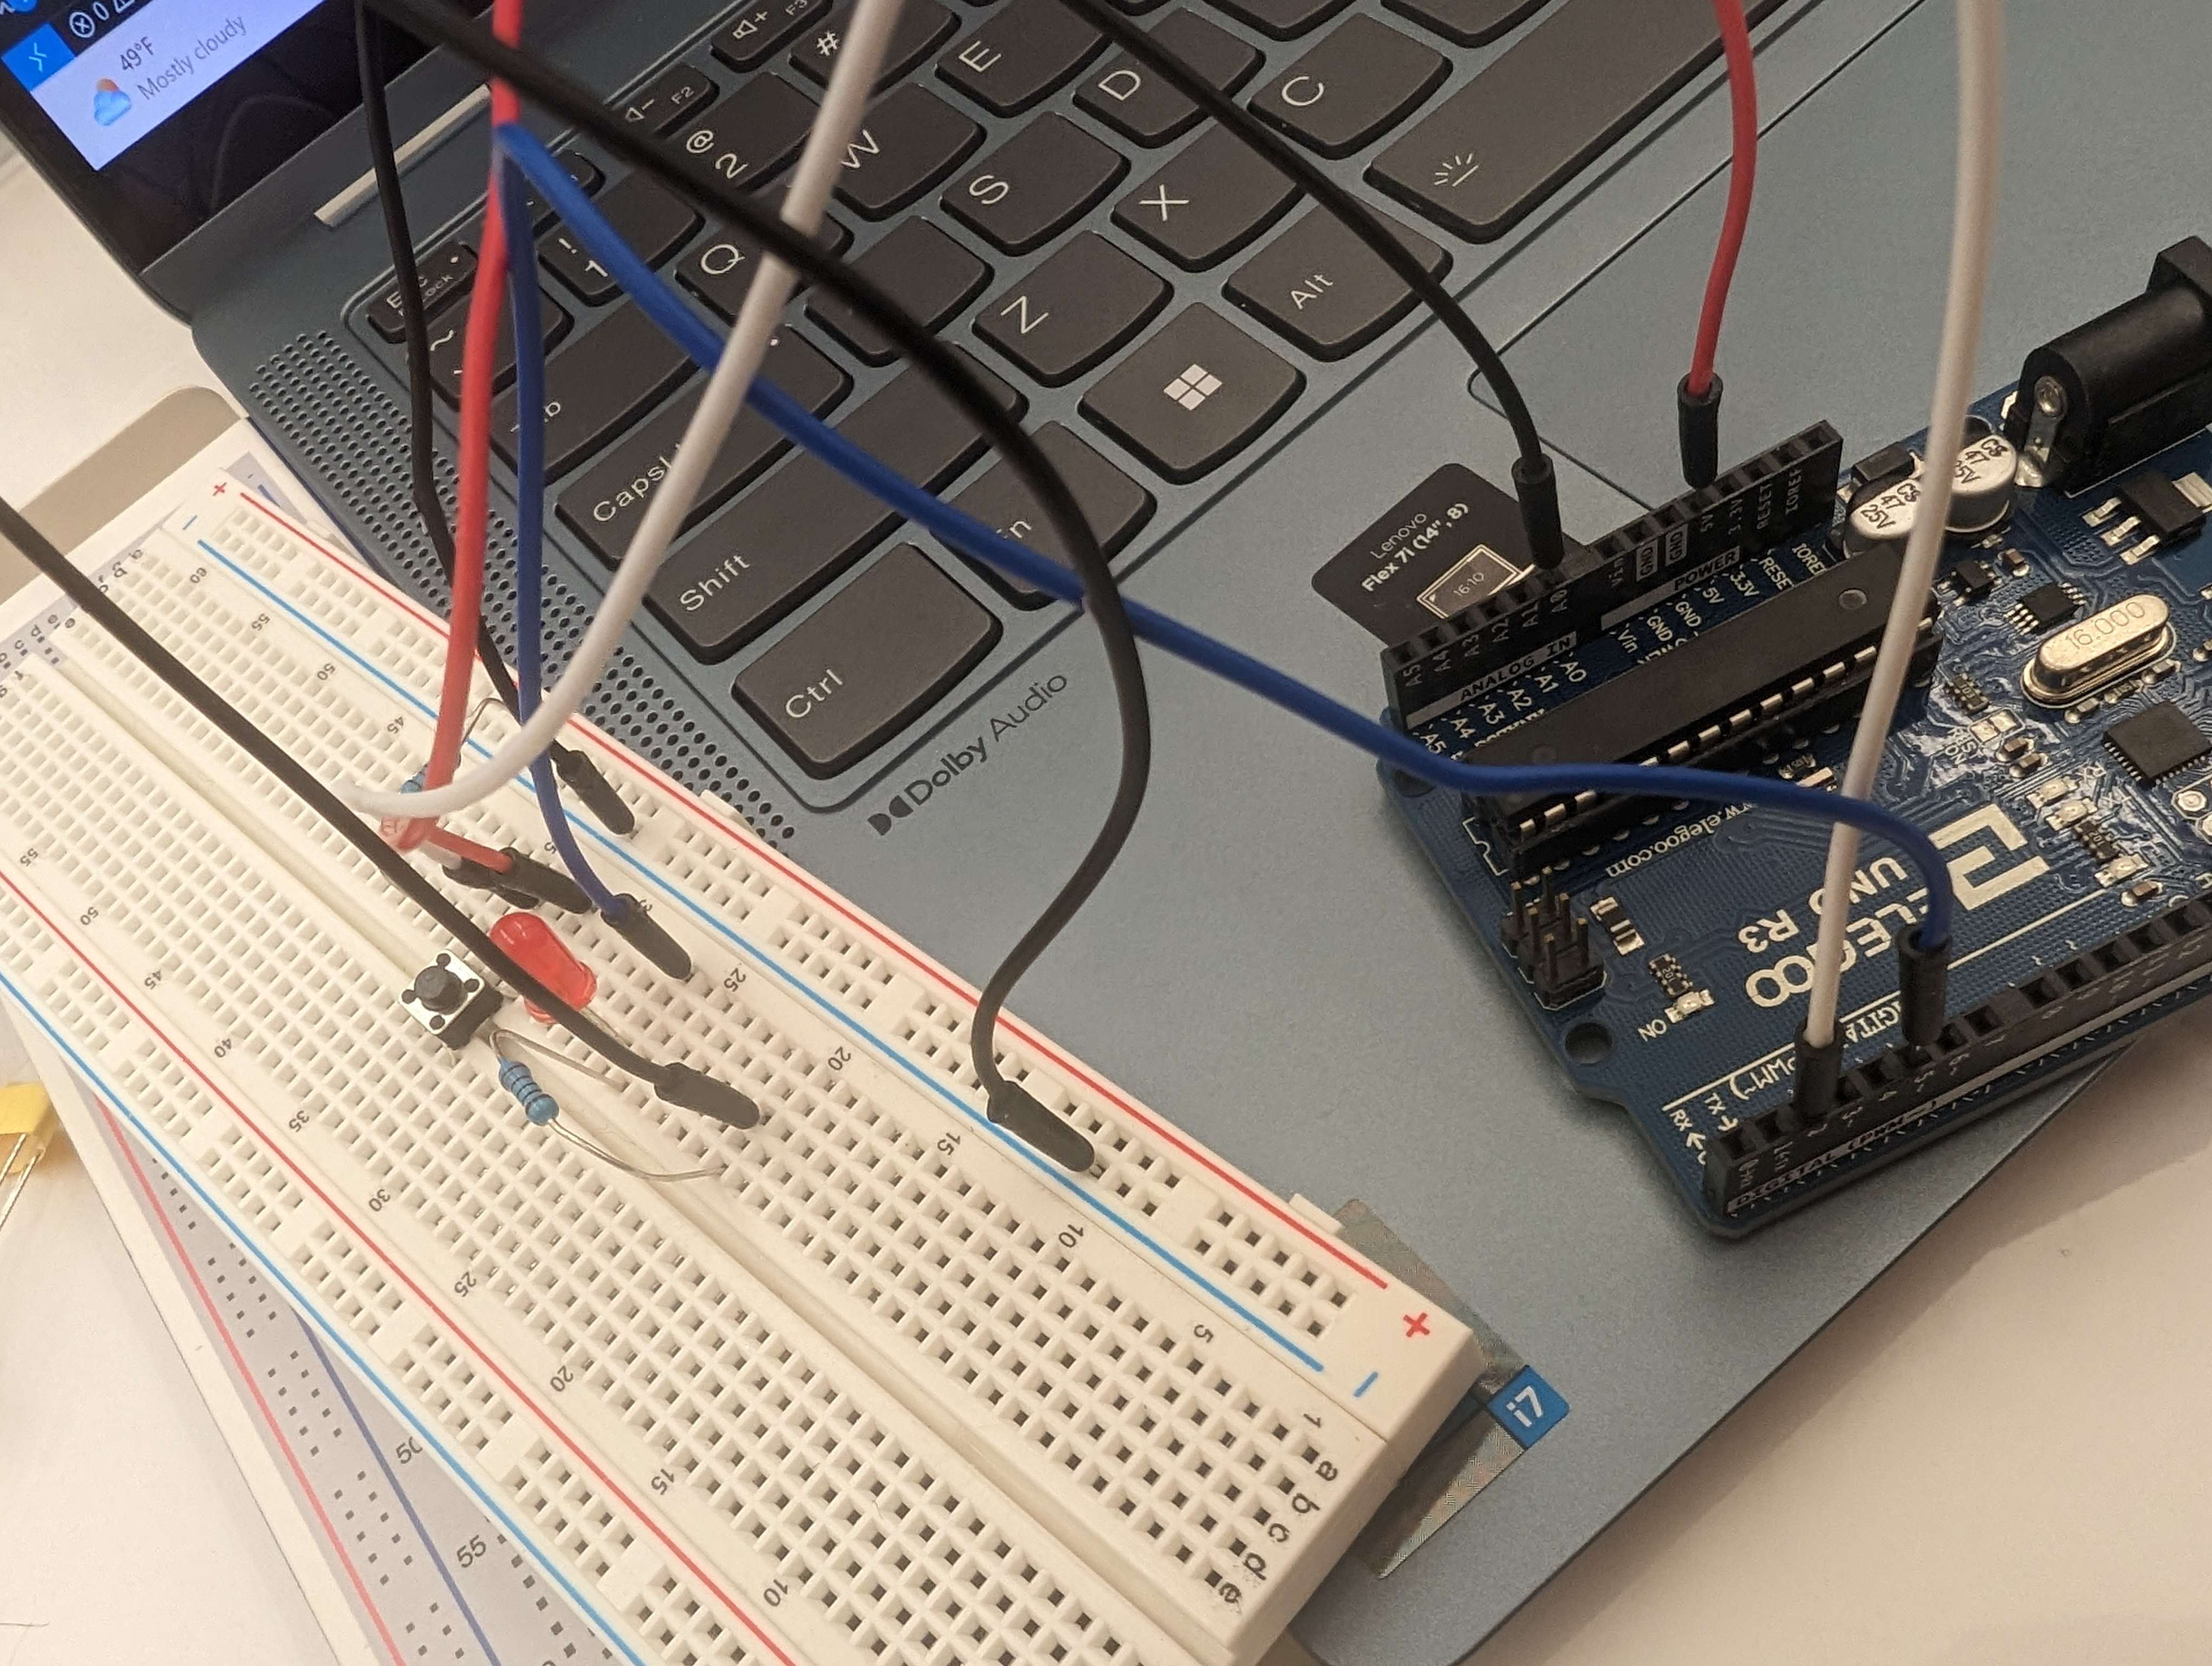
Above is my circuit. when pressing the button, the screen turns from "not pressed" to "pressed!".
When typing into the keyboard, the light of the LED changes depending on the ASCII unicode of the key that is pressed.
In the video, I am pressing "0" and the spacebar, which doesn't change the light much, but it still changes.
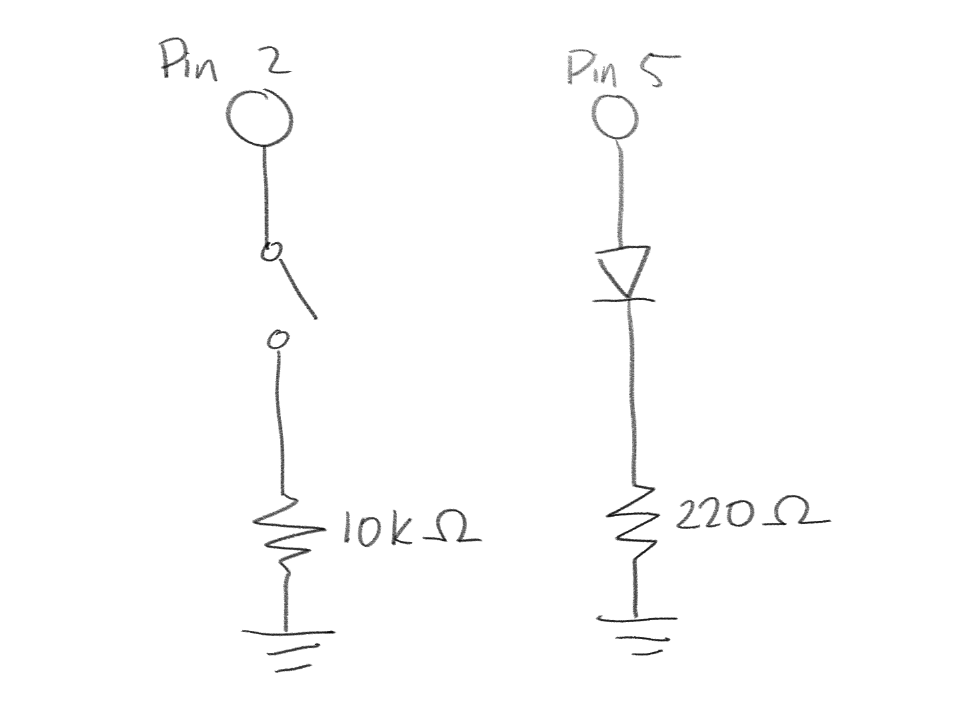
Above is my schematic. I had to use a 10k resistor for the button and a 220 resistor for the red LED.
        const int BUTTON_PIN = 2; // input pin from Arduino, yet to be set

        const int LED_PIN = 5; //PWM pin from Arduino


        void setup()

        {

        Serial.begin(9600); // begins serial

        Serial.setTimeout(10); // sets maximum seconds for serial data

        pinMode(BUTTON_PIN, INPUT); // sets the button as an input for the web

        pinMode(LED_PIN, OUTPUT); // sets LED as an output from the web

        }


        void loop()

        {

        Serial.println(digitalRead(BUTTON_PIN));

        delay(50);

        if (Serial.available() > 0) {   // if there's serial data

            int inByte = Serial.read(); // read it

            analogWrite(5, inByte);	// use it to set the LED brightness

        }

        }
        const BAUD_RATE = 9600; // This should match the baud rate in your Arduino sketch


        let port, connectBtn; // Declare global variables


        function setup() {

        setupSerial(); // Run our serial setup function (below)


        // Create a canvas that is the size of our browser window.

        // windowWidth and windowHeight are p5 variables

        createCanvas(windowWidth, windowHeight);


        // p5 text settings. BOLD and CENTER are constants provided by p5.

        // See the "Typography" section in the p5 reference: https://p5js.org/reference/

        textFont("system-ui", 50);

        textStyle(BOLD);

        textAlign(CENTER, CENTER);

        }


        function draw() {

        const portIsOpen = checkPort(); // Check whether the port is open (see checkPort function below)

        if (!portIsOpen) return; // If the port is not open, exit the draw loop


        let str = port.readUntil("\n"); // Read from the port until the newline

        if (str.length == 0) return; // If we didn't read anything, return.


        // trim the whitespace (the newline) and convert the string to a number

        const buttonState = Number(str.trim());


        // Change text and colors based on button state. In p5, you can set colors

        // using standard CSS color names as well as many other color formats.

        if (buttonState === 0) {

            // If the button is not pressed

            background("darkcyan"); // Background color

            fill("coral"); // Fill color for the text

            text("not pressed", windowWidth / 2, windowHeight / 2); // Position text in center of the screen

        } else if (buttonState === 1) {

            // If the button is pressed

            background("lightskyblue"); // Background color

            fill("yellow"); // Fill color for the text

            text("pressed!", windowWidth / 2, windowHeight / 2); // Position text in center of the screen

        }

        }


        // function to check key pressing

        function keyPressed() {

            console.log("writing key", key); // prints to console

            port.write(key); // writes the key to the Arduino LED

        }


        // Three helper functions for managing the serial connection.


        function setupSerial() {

        port = createSerial();


        // Check to see if there are any ports we have used previously

        let usedPorts = usedSerialPorts();

        if (usedPorts.length > 0) {

            // If there are ports we've used, open the first one

            port.open(usedPorts[0], BAUD_RATE);

        }


        // create a connect button

        connectBtn = createButton("Connect to Arduino");

        connectBtn.position(5, 5); // Position the button in the top left of the screen.

        connectBtn.mouseClicked(onConnectButtonClicked); // When the button is clicked, run the onConnectButtonClicked function

        }


        function checkPort() {

        if (!port.opened()) {

            // If the port is not open, change button text

            connectBtn.html("Connect to Arduino");

            // Set background to gray

            background("gray");

            return false;

        } else {

            // Otherwise we are connected

            connectBtn.html("Disconnect");

            return true;

        }

        }


        function onConnectButtonClicked() {

        // When the connect button is clicked

        if (!port.opened()) {

            // If the port is not opened, we open it

            port.open(BAUD_RATE);

        } else {

            // Otherwise, we close it!

            port.close();

        }

        }